Goodbye Mellow Yellow, Part 4
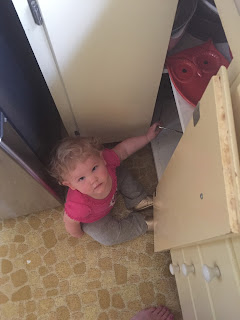
As previously mentioned, we are STILL working away at the kitchen. When we first started the kitchen, I hadn't thought about when we would replace the floor. Though, with everything starting to look pretty sweet, the floor had to go. Below is a close up of the floor (and a cute, mischievous baby #tbt).
The big decision...tile vs wood. Tile is so durable and there's obviously lots of options but it can get dated quickly. Also, there's one small detail about tile. I hate cleaning grout.
Wood floors are beautiful, but definitely easy to destroy with water, kids, clumsy pan-dropping, etc.
The decision to move the floors forward came pretty fast when I called an installer and he actually picked up the phone! (Anyone else find it impossible to get in touch with contractors?) We initially met at the end of April and planned out the process. We have White Oak Floors throughout the house, so it was easy to determine the kind of wood. We also discussed ways to protect our floors:
He also ensured the finish of the floors would match the rest of the house as best as possible. Though brand new wood and 100 year old wood will look slightly different.
So, who knew the process of installing wood floors takes so long? The oak would be delivered (deliveries are only on Thursday), then need to sit in our house for four days. Then, it would take one week to install, then it would sit unfinished for another week, then it takes one week for sanding and polyurethane, and THEN we wait two weeks before moving our appliances back in. Are you still reading this? Are you counting the time? That's over six weeks to get wood floors in the kitchen!
So, first thing is first, take out the old floors! We hired the neighborhood handy-man, Ricardo, for this and he made an awesome discovery...white and black checkered vinyl tile floor!

 After the linoleum was removed and we were left with the checkered (which is very cool, but dull and had staple holes every six inches or so), we were told by the wood floor guy that this would have to come out too. So, Ricardo came back a few days later (extending our time to finish).
 At the above stage, we started to panic. We didn't know what kind of toxic chemicals could be inside that black stuff. After three hours of internet research, we decided that the best thing to do was try not to remove it and just seal it in with the new wood floors.
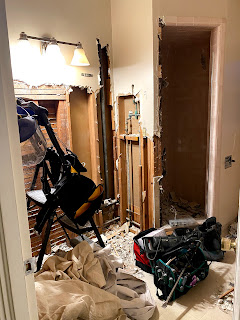
The next day (around the third week of May), Wood Floor Guy shows up and explains that the tongue and groove wood that's been sitting in our dining room for almost a week would be 1/4" taller than the rest of the floors in the house. So, we had to get new, thinner wood that would have to be nailed down, but that meant we would have to wait for another week. Ugh.
In the meantime, since we still had that nasty black stuff exposed, the Wood Floor Guy stapled a heavy paper over it (aka underlayment). Finally, he came back and installed the wood.
 At this point, I started to freak out a little, because the nail holes were quite prominent. No thanks to the pencil marks that were drawn across the wood every 7" or so. At least the wood is better than gold pebble.
 And, so these puppies sat for a week, and the last week of June the Wood Floor Guy came back and sanded and sealed and poly'd and did his THANG. As of June 23rd, we now have the most beautiful kitchen floors in the whole world.


The big decision...tile vs wood. Tile is so durable and there's obviously lots of options but it can get dated quickly. Also, there's one small detail about tile. I hate cleaning grout.
Wood floors are beautiful, but definitely easy to destroy with water, kids, clumsy pan-dropping, etc.
The decision to move the floors forward came pretty fast when I called an installer and he actually picked up the phone! (Anyone else find it impossible to get in touch with contractors?) We initially met at the end of April and planned out the process. We have White Oak Floors throughout the house, so it was easy to determine the kind of wood. We also discussed ways to protect our floors:
- Moisture detectors behind the fridge (if we run a water line for ice--which we don't) and under the sink.
- Area rugs.
- Plexiglas under the fridge to protect the floors from the heat of the fridge.
He also ensured the finish of the floors would match the rest of the house as best as possible. Though brand new wood and 100 year old wood will look slightly different.
So, who knew the process of installing wood floors takes so long? The oak would be delivered (deliveries are only on Thursday), then need to sit in our house for four days. Then, it would take one week to install, then it would sit unfinished for another week, then it takes one week for sanding and polyurethane, and THEN we wait two weeks before moving our appliances back in. Are you still reading this? Are you counting the time? That's over six weeks to get wood floors in the kitchen!
So, first thing is first, take out the old floors! We hired the neighborhood handy-man, Ricardo, for this and he made an awesome discovery...white and black checkered vinyl tile floor!


The next day (around the third week of May), Wood Floor Guy shows up and explains that the tongue and groove wood that's been sitting in our dining room for almost a week would be 1/4" taller than the rest of the floors in the house. So, we had to get new, thinner wood that would have to be nailed down, but that meant we would have to wait for another week. Ugh.
In the meantime, since we still had that nasty black stuff exposed, the Wood Floor Guy stapled a heavy paper over it (aka underlayment). Finally, he came back and installed the wood.


Here's photos of the threshold between the hallway to the foyer and the threshold between the kitchen and dining room. Not too noticeable.


Comments
Post a Comment