Posts

Showing posts with the label Snowbound

Grandmaster Bath: It's done-ish

Image
As per usual, the project has wrapped and I'm not getting around to an update until a couple of weeks later.

Goodbye Mellow Yellow, Part 6

Image
We are done (read 98%)! The tile is in and the appliances have been put back in place. We have a rug and something hanging on the wall (gasp!). It's been a looooooooong twisty road, but so worth it. I couldn't be happier with how it has all come together. So, about that 2%, here's what's left: Toe-kick under cabinets need to be painted. Quarter round trim around baseboards. Chips in paint from moving the fridge and the counter installed. Electricians back to figure out what's going on with two electric outlets. New oven and stove. I'll let you know in two years when we finally have it 100% over the finish line. So, how about some final pics? Yeah!

Goodbye Mellow Yellow, Part 3

Image
It's already mid-July? How did that happen? Of course we are still plugging along on the kitchen remodel. I think this marks two months without an oven/stove and a mudroom since our fridge takes up most of it. But, who's counting? By the end of May, Jesus had finished painting and we had our new Schoolhouse Electric Lights installed. Here's a close-up of the over-the-sink light. Since this picture was taken, we've exchanged the bulb with an Edison bulb. It's not as bright, but it's more period-appropriate.  Here are a few side by side shots of before and after painting. What a difference! Next post will be all about the floors and there is some drama involved!

Goodbye Mellow Yellow, Part 2.

Image
One month later and a lot of progress has been made on the kitchen. Ugh, but it's not done. We are inching toward the finish line. OF COURSE it always takes twice as long as you originally plan. After the cabinet doors and drawers were in, Tom and Nate took out their aggression the counters and back splash. By far it was the most gratifying as well as messy part of the reno. We are so lucky to have talented and amazing people in our world. Tom and his lovely wife, Betty, are our neighbors who have renovated/restored several homes. (They also give us fresh chicken eggs and figs from their tree) They gave us the confidence that we could take out the counters ourselves and even offered to help. While they worked, I pulled out all my mom-tricks to keep the girls occupied outside. In process pics:

Cinderella's Room 1.0

Image
Remember this room when we moved in? I barely do. It feels amazing to look back at the real estate photos and see how much progress we've made. This sleeping room/porch is one of the reasons why I love this house. For a recap of when and how this wallpaper came down and the beginning of this room's transformation, you can read about it here . Shortly after, the Handyman and I painted the walls SW Mint Condition, but didn't dare touch the trim. For a long time, the room looked like this. Yuck! We didn't touch the trim because there is A LOT of it. There are seven windows, three doors, and baseboards in this room. There was... Lots of chipped and cracked paint: Nail holes and damaged wood. Gaps between the baseboard and plaster wall: And, window hardware needing to be cleaned up. We knew that Jesus would need to save us on this one. The main reason it took so long to get back to this room is that I hadn't found the right ...

It's a.....GIRL!

Image
So, we've been a tad busy lately growing our home by two feet! harhar! In mid-March we added another little bundle of love, or as someone called her our "Chunk of Love". She is the reason these posts have been so few and far between. She is the reason why we are sleep-deprived zombies. She is the is the reason why the Handyman gave up his office. She is another reason why our hearts are so full. Here's the nursery in all of its decorated, girly glory.

You're Outta Here Part *&#@!!!--An office update

Image
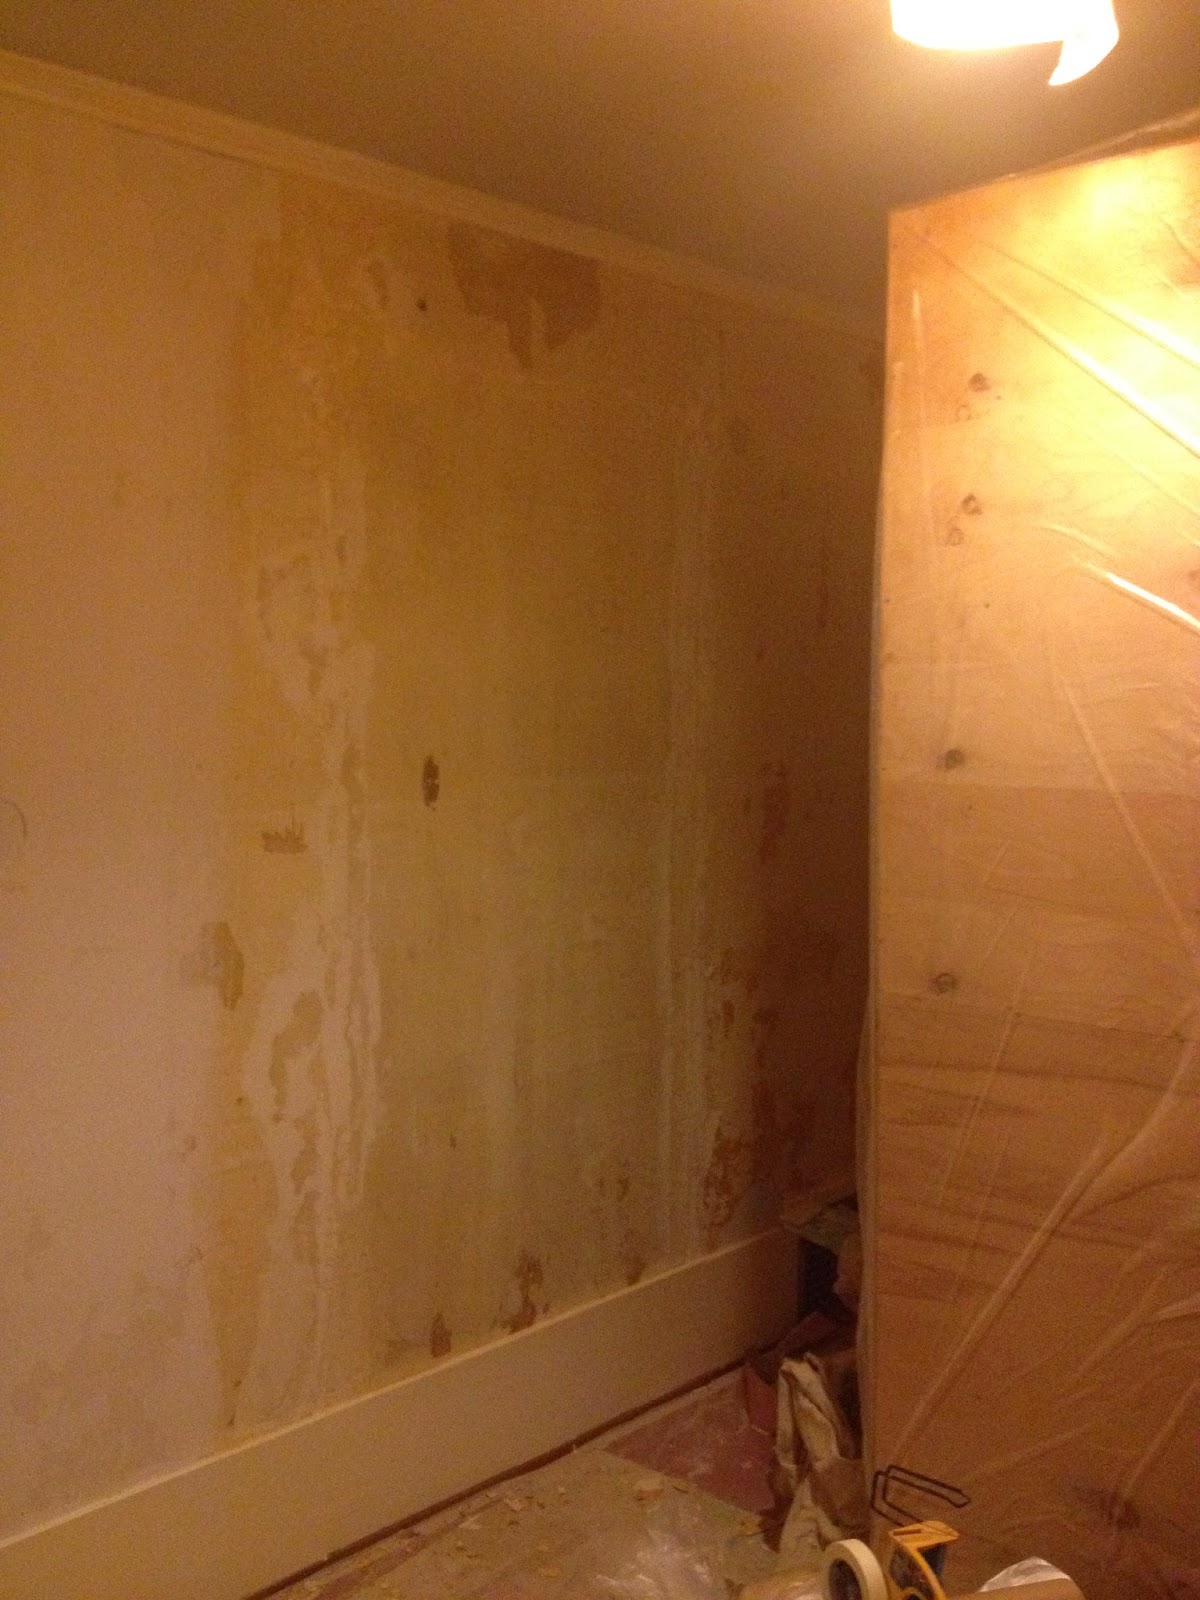
I don't even remember how many areas of wallpaper we've removed by this point--it all just runs together. I do know that after the old office's paper is removed, we just have one more to go! Hooray! After we moved the office to the guestroom (which used to be Cinderella's room, btw), we started to remove the wallpaper. It actually came off fairly easy but there were a few issues. Like the stairway and 2nd floor landing, the plaster was in bad shape in a few places. It was crumbly in a few spots. We also found evidence that the thick, striped paper was actually the second wallpaper in this room. We found some beige paper with tiny red flowers on it. There was a considerable amount of glue behind the wallpaper (joy). It's the yellowish-brown stuff in the picture below: And the windows were in bad, bad shape. This room, located on the South-side of the house, gets full sun so one of the windows takes a beating. The glazing had pretty much disintegrated t...

Christmas came early! (aka a HUGE update from the Pheasants)

Image
Our wonderful painter finished the entryway/stairs two weeks ago, and I haven't had a chance to blog about it since because I have been staring at the walls. Who am I kidding? It's the crazy holiday season and there has been no time for blogging! We picked the color Oyster Bay by Sherwin Williams for the walls and it is gorgeous! It's green, it's blue, it's gray. Depending on the light and time of day, it could be any one of these colors and they are all beautiful. We even got the thumbs up from Jesus on the color choice, which made us feel even better. Check it out! In these pictures, the green really shows through.

Guest Bedroom--It's Done!

Image
Wow! I can't believe it's already been over one month since my last blog post. We've had a lot going on in our world and the energy to blog about it has been at a minimum. I do want to share with you our awesome guest bedroom makeover! We actually finished it right before our friends, B&J, came to town at the end of July. When we moved in, you'll recall the room looked like this: In mid-June, my sister came in and took all the wall paper down but the glue decided to hang out a little longer. The tedious process of spraying, scraping, and sanding was left up to my Handy Man and he made great progress on the glue: Before spraying/scraping and sanding and after: Realizing this was as good as it was going to get, we started priming with TWO coats of Kilz. We chose the Kilz Max because it was supposed to cover up foul odors and this glue has a serious chlorine smell. In all honesty, I can still smell a faint whiff of glue. Here's the room "primed...